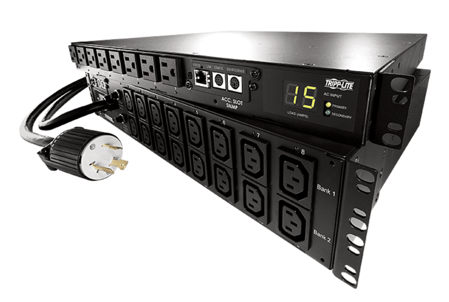
 When you're getting ready to determine which power solutions you want to incorporate into your facility, you have a lot to consider. One decision you'll need to make is around your Power Distribution Unit (PDU) setup - which PDU is right for your purposes? In this blog post with Tripp Lite by Eaton, we'll look at the four steps you can use to make that choice easy.
Step 1: Determine PDU Mounting
You'll want to begin by figuring out whether you want to mount the PDU vertically or horizontally. When mounted vertically, a PDU occupies no rack spaces (0U), because it is attached to one of the rack's vertical rails. Many PDUs even feature button mounting to simplify this type of installation, in which you would slide the mounting buttons that are located on the PDU into the mounting holes featured on most major racks. This process takes only a few seconds and is vastly improved over the traditional method of mounting a PDU with screws.
When you mount a PDU horizontally, it will typically occupy one or two rack spaces (1U or 2U). Most PDUs offer a 10- to 15-foot input cord, since they generally function as the entry point for power into a rack. You have some more options with this method, since those cords allow you to mount the PDU anywhere within the enclosure - even on top of the rack!
Step 2: Determine PDU Input Phase
Alright, now that you've figured out how you want to mount your PDU, it's time to determine the input phase. What does "phase" mean, exactly? Well, when power moves along a transmission line, it moves in the form of a wave. Each waveform is called a "phase." Utility companies deliver three waveforms, which we could also call three phases, on the same transmission line from their generator to a facility. The phase of the PDU must match the phase of the outlet into which it is plugged, and some PDUs can accept single-phase input that has been split by a facility's electrical panel, and some accept 3-phase input delivered straight through the panel from the utility company's generator.
You can determine your site's input phase by checking the service fuses on the switch board or by looking at your site's main switch on the meter board, sub board or distribution board.
Step 3: Determine PDU Input and Output
Two down, two to go! Now that you've determined how to mount your PDU and what the input phase needs to be, you need to consider the PDU's input and output. This part of your decision-making is comparatively simple, but it's just as critical, since it can cause some major problems during installation. Connectivity types vary so widely, and it can be difficult to identiy the various plugs and receptacles. That's why it's important to be precise with the selections you make.
What kind of INPUT plug should the PDU have? Ideally, the input should be connected to a UPS system or generator-supported power source. Many PDUs are rated for worldwide use and have a detachable power cord with an input to which the user attaches their local plug.
What types of OUTPUT receptacles should the PDU have? If a customer’s equipment runs on either low or high voltage, they may want to replace the low-voltage power cords that came with their equipment with high-voltage power cords. If this is the case, the customer would require a high-voltage PDU.
Step 4: Choose the Right Type of PDU
Last step! Once you’ve determined the application requirements for the PDU, it's time to return to what you want to do with the PDU. Depending on your answers, we can narrow down your choices to one of four categories: basic, local metered, monitored or switches. Single-phase PDUs are available in all four categories, so that one's easy. Three-phase PDUs are available local metered, monitored or switched versions.
Ready to pick your ideal PDU? Contact your local Accu-Tech representative for assistance. We'll work with you and Tripp Lite by Eaton to help you determine what will work best in your facility. Want to learn more about Tripp Lite? Visit their page on our website.


.png?width=58&height=58&name=X_logo_2023_(white).png)
